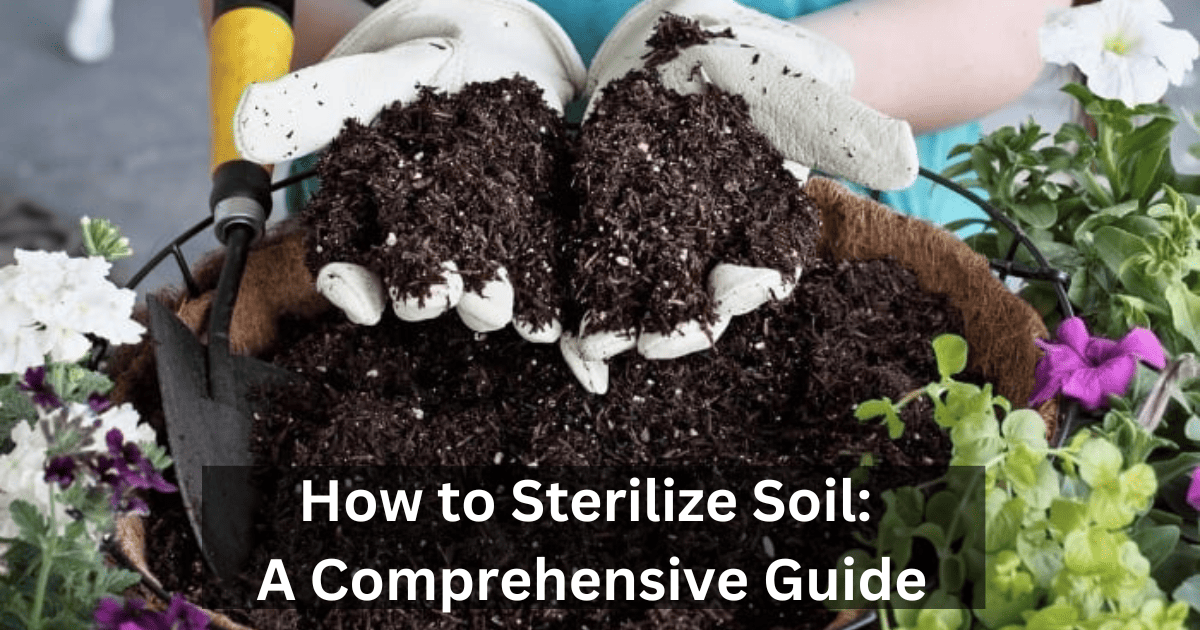
How to Sterilize Soil: 5 Important Reasons With Comprehensive Guide.
One of the most important aspects of gardening is ensuring that your plants are healthy. Sterilizing the soil is one of the most important steps in growing healthy plants.
Sterilizing soil is a simple process that can be done using either chemical or physical methods. This will kill any harmful bacteria, fungi, or insects that might be present.
There are a number of ways to sterilize the soil, and the method you choose will depend on the type of plant you are growing and the size of the area you need to sterilize.
Chemicals are the most common and popular method but have some drawbacks. First, they can be expensive. Second, they can be harmful to the environment.
On the other hand, physical methods are less expensive and better for the environment. In this article, we will provide a complete guide on how to sterilize soil.
By the end of this article, you will know everything you need to know about sterilizing soil for your garden. With the right techniques and tools, you can effectively eliminate these threats and create a clean, fertile environment for your plants to thrive.
We’re going to talk about how to sterilize soil, so let’s get started.
Why is Soil Sterilization Important?
Soil sterilization eliminates or reduces harmful microorganisms, pests, and unwanted plants like Pokeweed from the soil. This process is essential for many different reasons. Here, we will discuss why soil sterilization is important and what benefits it provides.
1. Preventing Disease Spread
One of the most critical reasons for soil sterilization is to prevent the spread of disease. Soil-borne diseases can cause significant damage to crops and spread easily from one plant to another.
By sterilizing the soil, you can eliminate these harmful microorganisms and prevent the spread of disease, keeping your crops healthy and thriving.
2. Eliminating Pests
Pests like nematodes and insects can also cause damage to crops. By sterilizing the soil, you can eliminate these pests and prevent them from causing harm to your plants. This is especially important in areas where pests are rampant and can cause significant damage to crops.
3. Promoting Plant Growth
Sterilizing the soil can also promote plant growth. Plants can absorb nutrients more efficiently and grow more robustly when the soil is free of harmful microorganisms and pests. This is especially important for crops that require a specific soil pH level and nutrient composition to thrive.
4. Reducing Chemical Use
Soil sterilization can also help reduce the use of chemicals in gardening. Pesticides and other chemicals can have harmful effects on the environment and can also be expensive.
By eliminating pests and harmful microorganisms through sterilization, gardeners can reduce the need for these chemicals, making gardens more sustainable and cost-effective.
5. Improving Soil Quality
Lastly, soil sterilization can improve soil quality. When soil is free of harmful microorganisms and pests, it can be easier to maintain soil structure and nutrient levels. This can lead to healthier soil and better crop yields in the long run.
Overall, soil sterilization is an essential process in agriculture. It helps prevent the spread of disease, reduces pests, promotes plant growth, reduces chemical use, and improves soil quality.
By using this process, farmers can protect their crops and ensure that they are healthy, productive, and sustainable.
What is the Best Time to Sterilize Soil?
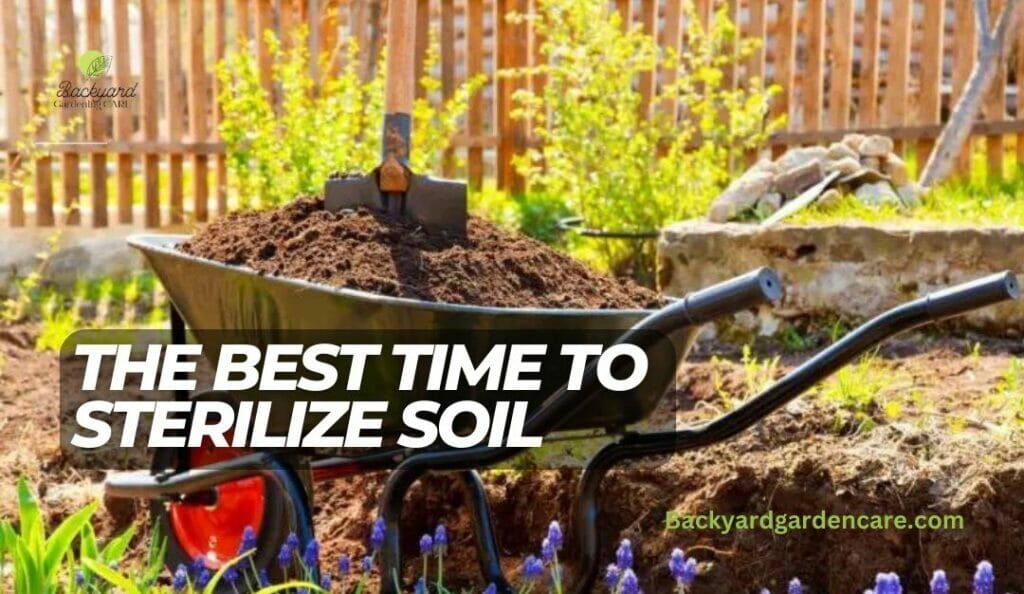
Soil sterilization is crucial in maintaining plant health and promoting strong growth. The timing of soil sterilization can vary depending on the soil type and plants you’re growing.
The best time to sterilize soil can vary based on Experience and regional climate. In my own gardening journey, I’ve found that early spring is often the most practical time to sterilize soil. This timing aligns with preparing the garden for the upcoming growing season.
By sterilizing the soil in early spring, I ensure a clean slate, free from pests and diseases, for my plants to thrive. However, I’ve also learned that flexibility is key. Depending on the specific needs of your garden, late fall after the harvest or just before planting may be more suitable.
Your decision should be guided by factors such as climate, the prevalence of soil-borne issues, and the timing of your gardening activities. Ultimately, personal experience and observation of your garden’s unique conditions will help you determine the best time for soil sterilization to achieve optimal results.
How to Sterilize the Soil?
Soil sterilization is essential for gardeners because it helps to eliminate unwanted pathogens, pests, and weeds that could harm your plants. These organisms can easily spread from one plant to another, causing damage and even killing your crops.
In this part, we’ll discuss different methods of soil sterilization and provide step-by-step instructions on how to do it.
Methods of Sterilizing Soil
There are several methods of sterilizing soil; the most common methods of soil sterilization include heat, chemicals, solarization, and many others, with pest control chemicals being one method.
Heat Sterilization
Heat sterilization is one of the most effective methods of sterilizing soil. In the soil, there are a lot of harmful pathogens and pests which are present, and this process will help to destroy them as well.
Here we will discuss all heat sources of Sterilization.
1. How to Sterilize Soil in Oven.
Sterilizing soil is crucial in creating a healthy environment for your plants. While there are various methods available, one effective and accessible option is using your oven.
By following a few simple steps, you can sterilize the soil in the oven and ensure that harmful organisms are eliminated. Here are some simple steps on how to sterilize soil in the oven.
Step 1: Moistening the Soil
To start the sterilization process, ensure that the soil is well-moistened by adding water and mixing it in thoroughly. But, it’s important to be mindful of not overwatering the soil, as this can lead to a runny or excessively saturated texture.
The ideal moisture level will allow for steam to be produced during sterilization, so aim for just the right amount of moisture.
Step 2: Preparing the Containers.
To ensure your soil is properly contained, take the time to prepare the right containers. Choose heat-resistant trays or containers that can withstand the temperature of your oven. Make sure they are deep enough to hold an ample amount of soil.
Step 3: Covering with Aluminum Foil
cover the tops of the containers with aluminium foil. This step is crucial in creating a sealed environment that allows heat to penetrate the soil effectively. Ensure the aluminium foil is tightly secured to prevent steam from escaping and compromising sterilization.
Step 4: Preheating the Oven
Preheat your oven to 200°F (93°C). It’s essential to have the oven at the correct temperature to achieve optimal sterilization results. This temperature is sufficient to kill most pests, pathogens, and weed seeds in the soil.
Step 5: Monitoring the Temperature
To ensure successful soil sterilization, monitoring its internal temperature closely is important. Using a meat thermometer, check the internal temperature and monitor the temperature until it reaches 180°F (82°C).
Which is considered the ideal temperature for sterilizing soil. By closely monitoring the temperature, you can ensure your soil is fully sterilized and ready for use in gardening or planting projects.
Step 6: Allowing the Soil to “Bake”
Once the soil temperature reaches 180°F (82°C), allow it to “bake” for approximately thirty minutes without opening the oven door. This allows the heat to penetrate deeply and ensures complete soil sterilization. For optimal results, allow the soil to absorb the heat before using it for your gardening needs.
Step 7: Cooling to Room Temperature.
Once the baking time is up, turning off the oven and allowing the soil to cool to room temperature inside is important. Remember to avoid opening the oven door during the cooling process, as this can interrupt the sterilization process and potentially introduce contaminants into the soil.
Following these steps, you can easily sterilize the soil in your oven, creating a healthy and conducive growing environment for your plants. Remember to exercise caution while working with the oven and follow safety guidelines to avoid accidents or injuries.
2. Sterilize the Soil in the Microwave.
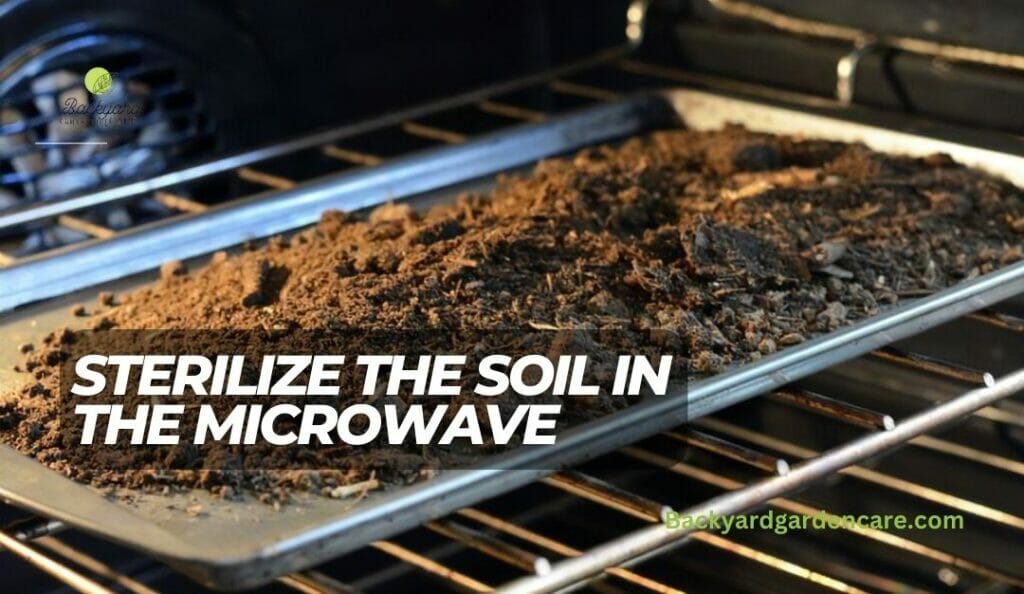
Looking for a quick and easy way to sterilize your small amount of soil? Try using your microwave! This efficient and convenient method effectively eliminates potentially harmful organisms from your soil.
Step 1: Inspect the Soil
Before using the microwave, thoroughly examining the soil for any metal objects is important. Metal can be hazardous, and cause sparks when exposed to microwaves, so it’s crucial to ensure that there is no unwanted debris in the soil. Take the time to carefully inspect the soil before proceeding to minimize any potential safety risks.
Step 2: Prepare the Soil
To prepare for sterilization, fill a clean zip-top plastic bag with around two pounds of moist soil. The soil should be damp enough to hold its shape when compressed but not too wet or runny. The moisture will aid in creating steam during sterilization, ensuring effective results.
Step 3: Leave the Bag Open
During the microwaving process, leaving the top of the plastic bag open is recommended so that steam may escape. This prevents pressure build-up and potential hazards. It’s important not to seal the bag completely to ensure safe steam release.
Step 4: Microwave on High
Set the microwave to high power and place the bag of soil in the center. Your microwave’s power will determine how long it takes to reach the desired temperature.
The goal is to heat the middle of the soil to a temperature between 180℉ and 200℉ (82℃ and 93℃), which is considered effective for sterilization.
Step 5: Remove and Close the Bag
It is important that after a microwave bag has reached the desired temperature range, it should be carefully removed from the microwave. There is a possibility that it may be hot, so please be careful.
Ensure that the top of the bag is securely closed to maintain the sterilized environment and prevent contamination from outside sources from entering the bag.
Step 6: Allow Cooling in a Cooler
It is important to place the closed bag of soil within an insulated container, such as a cooler or similar item. Allow the soil to cool naturally to the ambient temperature. This step ensures that the sterilized soil remains free from contaminants and is ready for use.
Following these steps can help you sterilize soil quickly and efficiently in the microwave. It’s essential to pay attention to safety precautions and avoid using metal objects or un microwave-safe containers.
3. How to Sterilize Soil with Hydrogen Peroxide.
Sterilizing soil with hydrogen peroxide is an efficient and simple way to eradicate harmful organisms and pathogens. By following a few easy steps, you can guarantee that your soil is free from pests and diseases.
Here are the essential steps to sterilize soil with hydrogen peroxide effectively.
Step 1: Prepare for the Process
Before you start, it is important to note that you should be working in a well-ventilated area to prevent inhaling harmful fumes. Additionally, wearing protective butyl gloves is crucial to protect your skin from any potential irritation.
Step 2: Determine the Dilution Ratio.
Choose the appropriate dilution ratio based on the size of the soil batch you are working with. Here are the recommended ratios for various soil batch sizes.
- Small batch (e.g., for a pot or container): Mix 1½ teaspoons of hydrogen peroxide with 1 cup of water.
- Medium batch (e.g., for a larger pot or several containers): Mix 2 tablespoons of hydrogen peroxide with 1 quart of water.
- Large batch (e.g., for a garden bed): Mix ½ cup of hydrogen peroxide with 1 gallon of water.
- Extra-large batch (e.g., for a larger garden area): Mix 2½ cups of hydrogen peroxide with 5 gallons of water.
Step 3: Mix the Solution.
To prepare the solution, mix the correct amount of hydrogen peroxide with the required volume of water as per the chosen dilution ratio. Stir the mixture well to ensure an even distribution of the hydrogen peroxide. This will help you to achieve the desired concentration for your specific use case.
Step 4: Transfer to a Spray Bottle.
To ensure an even distribution of the diluted hydrogen peroxide solution onto the soil, it is recommended to transfer it into a spray bottle carefully. This method allows for precise application and coverage.
Step 5: Spray the Soil
To sterilize the soil effectively, be sure to moisten it with the diluted hydrogen peroxide solution evenly. We recommend spraying the solution late afternoon or early evening to reduce premature evaporation. As you spray, the solution will work into the soil, effectively sterilizing it.
Step 6: Allow Evaporation
Leaving the sprayed soil undisturbed until the following morning is recommended for best results. During this time, the hydrogen peroxide will completely evaporate, leaving behind sterilized soil ready for planting.
Following this process can effectively disinfect the soil while minimizing potential harm to beneficial microorganisms. Remember to handle hydrogen peroxide carefully, wear protective gloves, and follow all safety guidelines.
4. How to Sterilize Soil with Boiling Water
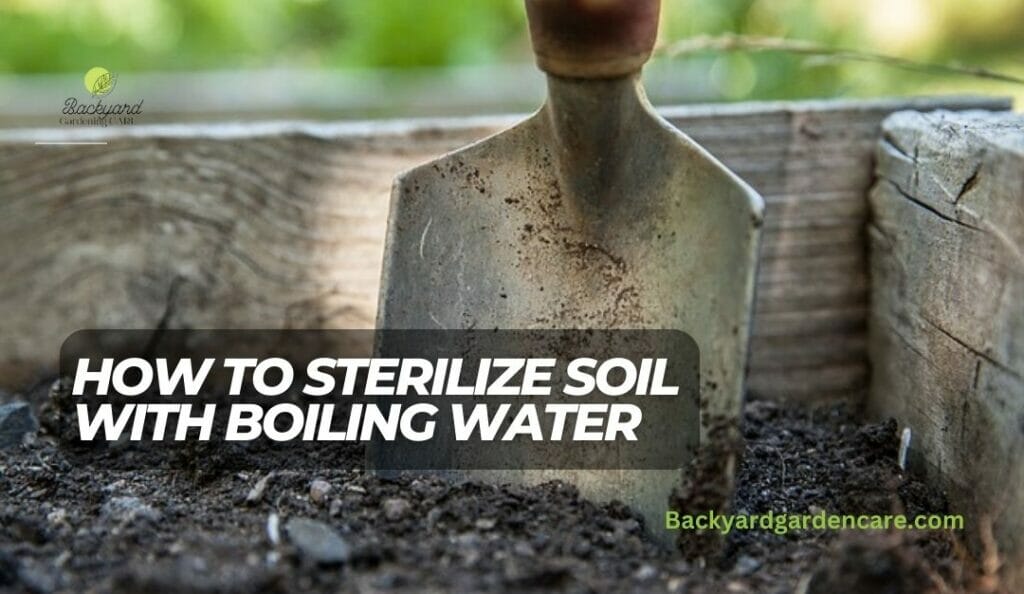
Boiling water can effectively sterilize soil and eliminate pests and pathogens. It’s perfect for small to medium batches of potting soil. You can keep your soil free from harmful organisms with a few simple steps.
Step 1: Prepare the Soil
To prepare, take a large heat-proof bowl and fill it up to about two-thirds with potting soil or soil mix. Keep the bowl aside, as it will be used to hold the boiling water.
Step 2: Boil Water
Choose the right-sized pot to sterilize. Fill it with water and heat until it boils. Ensure the water is hot enough to kill any harmful pathogens and microbes in the soil.
Step 3: Pour Boiling Water into the Soil
To sterilize soil effectively, follow these steps carefully.
- Remove the pot of boiling water from the stove and place it on a heat-resistant surface.
- Position the bowl of soil in the sink to make it easier and safer to handle.
- Gradually pour the boiling water into the bowl of soil, ensuring that the water is evenly distributed and does not make the soil too soggy or runny.
- The goal is to moisten the soil and provide enough heat to sterilize it thoroughly.
Step 4: Work the Water into the Soil
Use a spoon or gardening tool to distribute boiled water evenly throughout the soil mixture. This ensures that the heat reaches all parts of the soil, eliminating pests and pathogens.
Step 5: Allow the Soil to Cool
After watering the soil, let it cool to room temperature before use to prevent heat damage to your plants.
5. How to Sterilize Soil in the Sun.
Looking to sterilize your soil using an eco-friendly and effective technique? Look no further than solarization. Solarizing soil is a natural and effective method of sterilizing soil using solar power.
By harnessing the power of the sun’s heat, solarization can eliminate pests, diseases, and weed seeds from your clay or loamy soil. This natural method is particularly well-suited for large gardens that receive plenty of sunlight.
Step 1: Choose the Right Time and Location
Select a spot in your garden that receives at least 6-8 hours of direct sunlight daily. Ideally, this process should be carried out between June and August when the sun’s intensity is at its peak.
Step 2: Prepare the Area
To prepare the area for soil sterilization, place a clear or transparent plastic sheeting with a medium thickness over the designated area.
Ensure that the plastic sheeting covers the entire area where you plan to sterilize the soil. This will help to prevent any contamination and ensure effective sterilization of the soil.
Step 3: Break up Clumps and Remove Debris.
Preparing the soil before spreading it onto the plastic sheeting is important for optimal results during the solarization process.
Break up clumps and remove rocks or plant matter from the soil to ensure an even heat distribution. This will help to create a smooth and consistent surface for the solarization process to take place.
Step 4: Spread the Soil
To ensure proper coverage, evenly spread the soil over the plastic sheeting and ensure that it lies flat. Leave a few inches of space between the sheeting’s edges and the soil to achieve a secure and complete covering.
Step 5: Cover with Another Layer of Plastic
Place a second layer of plastic sheeting over the soil, pulling it tightly to cover the soil surface. Secure the edges of the plastic sheeting with stones or other weights.
For optimal heat retention, you can also bury the edges of the plastic sheeting with soil, creating a seal that traps the heat within.
Step 6: Allow Solarization to Occur
To create a clean and ideal growing environment, it is recommended to cover the soil with plastic sheeting for 4-6 weeks.
This allows the sun’s heat to penetrate and sterilize the soil, eliminating pests, diseases, and weed seeds. Keep an eye on the progress of solarization by regularly monitoring the soil’s moisture levels and adjusting as needed.
The plastic sheeting creates a greenhouse effect, raising the temperature in the soil to lethal levels for pathogens and pests. However, ensuring that the soil remains moist but not saturated for optimal results is important.
Step 7: Uncover and Use Sterilized Soil
After the recommended solarization period, carefully remove the top layer of plastic sheeting. Allow the soil to cool and return to ambient temperature before using it for planting or other gardening purposes.
The sterilized soil is ready to provide a clean and healthy environment for your plants. By following these steps, you can effectively sterilize soil using the sun’s energy through the solarization method.
6. How to Sterilize Soil with Commercial Soil Sterilization Chemicals:
Commercial operations favor chemical sterilization of soil due to its convenience and speed. However, it comes with significant drawbacks, such as high costs and hazards, especially among homeowners.
Commercial soil sterilization is a crucial practice in large-scale agriculture and horticulture. This process involves various methods, including steam sterilization, chemical treatments, solarization, and more, aimed at eliminating harmful pathogens, weeds, and pests from the soil.
It ensures a clean and disease-free environment for crop cultivation, especially in situations where disease pressure is high or strict regulatory requirements must be met. Commercial growers often employ soil sterilization in conjunction with other soil management practices to maintain soil health and fertility.
Careful attention to safety and environmental regulations is essential when using chemical sterilants in commercial operations to ensure both effective sterilization and responsible land stewardship.
Health and Safety Risks
Proper safety protocols and protective gear are crucial when working with chemicals to minimize potential health and safety risks to individuals involved in the application process and those nearby.
Limited Spectrum of Effectiveness
Modern chemicals used for soil sterilization are limited in their effectiveness, often requiring different chemicals to address various pathogens or pests.
In most cases, a single chemical will only target a select few diseases or pests. This increases the complexity and cost of the process.
Quarantine Period
The quarantine period is a must after chemical application to soil. It allows the chemicals to degrade or be flushed out fully. Neglecting the quarantine period can lead to harmful residues in the soil, potentially being absorbed by plants and accumulating in their tissues.
Residue Concerns
Improper chemical application can leave unwanted residues in soil, posing a risk to plants and potentially causing chemical concentration in plant tissues. Care must be taken to apply chemicals correctly and follow recommended guidelines to minimize the risk of residues.
Development of Resistance
Using chemicals for soil sterilization long-term can lead to resistance to diseases or pests, making the treatment less effective or useless. Integrated pest management and alternative methods should be considered for long-term efficacy.
While chemical sterilization may offer convenience and efficiency, the associated drawbacks and risks make it a less favourable option, particularly for home gardeners.
Summary
sterilizing soil is important for any gardener or farmer who wants to ensure healthy and disease-free plants. There are several methods to sterilize the soil.
The best method depends on the type of soil, the desired outcome, and the resources available.
You can effectively eliminate harmful pathogens and pests from your soil.
Whether you choose to use heat, chemicals, or natural methods, taking the necessary precautions to protect yourself and your plants during sterilization is crucial.
Utilizing these techniques can create a safe and fertile environment for your plants to thrive and grow.
FAQs About Sterilizing Soil
How Do You Naturally Sterilize Soil?
One way to naturally sterilize soil is by solarization. This involves covering the soil with clear plastic and allowing the sun’s heat to kill unwanted organisms. Another method is to use steam or boiling water to sterilize the soil.
However, it is important to note that sterilizing soil can also kill beneficial microorganisms, so it should only be done when necessary.
What is the Most Common Method of Sterilizing Soil?
The most common method of sterilizing soil is through the use of heat, either by baking or steaming the soil.
What Are the Three Methods of Soil Sterilization?
The three methods of soil sterilization are chemical sterilization, steam sterilization, and dry heat sterilization.
Jack Ralph

hey, I’m Jack Ralph, a dedicated grass and lawn expert with years of experience creating beautiful outdoor spaces. I can help you achieve the lawn of your dreams, from seeding to mowing, turning your yard into a natural masterpiece.
Look no further—I’m the key to transforming your lawn dreams into reality! and here to help you achieve a lawn that’s not just a patch of grass, but a canvas of natural artistry.